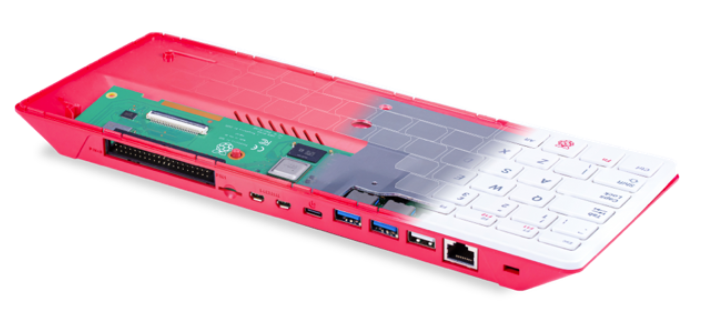
Raspberry Pi 4

 Model List:

Raspberry Pi 4


Raspberry Pi 400


Raspberry Pi Zero 2 W


Raspberry PI CM4 IO Board


Family

Model

SoC

Memory

Form Factor

Ethernet

Wi-Fi

USB

GPIO

Released

Raspberry Pi

B

BCM2835

256 MB

Standard

Yes

No

26-pin

2012

512 MB

2012

A

256 MB

No

2013

B+

512 MB

Yes

40-pin

2014

A+

Compact

No

Raspberry Pi 2

B

BCM2836 / 7

1 GB

Standard

Yes

No

2015

Raspberry Pi Zero

Zero

BCM2835

512 MB

Ultra-compact

No

No

W / WH

Yes

2017

2 W

BCM2710A1

2021

Raspberry Pi 3

B

BCM2837A0 / B0

1 GB

Standard

Yes

Yes

2016

A+

BCM2837B0

512 MB

Compact

No

Yes

2018

B+

1 GB

Standard

Yes

2018

Raspberry Pi 4

B

BCM2711

1 GB

Standard

Yes

Yes

2 X USB 3.0 ports

2 X USB 2.0 ports.

2019

2021

2 GB

2019

4 GB

8 GB

2020

400

4 GB

Keyboard

2 × USB 3.0

1 × USB 2.0 ports

CM4

Standard

NO

YES

NO
(Support PCIe Gen2 X1)

Raspberry Pi Pico

Pico

RP2040

264 KB

Pico

No

No

2021

W

Yes
(2.4Ghz 11n)

1 ×
micro-USB 1.1

2022

Raspberry Pi OS

  • Raspberry Pi OS with desktop (32-bit)

  • Raspberry Pi OS (64-bit)

  • Raspberry Pi OS (Legacy 32-bit)

Raspberry Pi官方推薦第三方作業系統

  • Ubuntu MATE - 2016年4月由官網推出Raspberry Pi版本。

  • Ubuntu Core - Ubuntu的開發由英國Canonical有限公司主導,南非企業家Mark Shuttleworth所創Canonical透過銷售與Ubuntu相關的技術支援和其他服務來產生收益。

  • Ubuntu Server - 自Ubuntu 5.10版(Breezy Badger)起,與電腦版同步發行,可當作多種軟體伺服器,如電子郵件伺服器、基於LAMP的Web網站伺服器、DNS伺服器、檔案伺服器與資料庫伺服器等。伺服器版通常不預裝任何桌面環境,與電腦版本相比,佔用空間少,執行時對硬體要求較低,最少只需要500MB硬碟空間和64MB記憶體。
    OSMC[33] - OSMC成立於2014年, 是一個以Linux核心的免費開源媒體播放器, 可讓你從本地網路儲存裝置和Internet播放媒體。

  • LibreELEC[34] - LibreELEC是專為Kodi在當前的媒體中心硬體上構建的輕量級❝剛剛足夠的操作系統❞Linux發行版。

  • Mozilla WebThings- Mozilla WebThings是Mozilla的Web of Things的開源實現,包括WebThings Gateway和WebThings框架。

  • PiNet - Raspberry Pi教室的免費和開源集中式使用者帳戶和檔案儲存用Linux。

  • RISC OS - 在2011年,一個移植的Cortex-A9 PandaBoard已宣布和樹莓派在公眾場合露面的開發版本可免費下載的候選發布版已跟進,這版本已免費提供樹莓派使用者。

  • Weather Station - Raspberry Pi Oracle Weather Station的Raspbian映像檔。

  • IchigoJam RPi - 將Raspberry Pi直接引導到IchigoJam BASIC介面運作。

其他作業系統

  • Windows 10 IoT Core - "Windows 10 IoT 核心版"為微軟提供的免費 Windows 10版本,,在樹莓派2以上版本都可運作正常。[40]

  • Windows 10 ARM - Windows 10在ARM64平台上的版本,提供仿32和仿64的X86應用程式模擬運行。

  • Windows 11 ARM - Windows 11在ARM64所推出的版本,提供仿64的X86應用程式模擬運行。

  • Arch Linux ARM - 非官方支援,由Arch Linux ARM計畫維護。

  • Pidora - 為 Raspberry Pi移植的Fedora的重製版本。

  • Puppy Linux - 是一個小型的Linux獨立發行版。包含SeaMonkey, AbiWord, Gnumeric, Gxine/xine等應用程式。 該發行版現由Barry Kauler等維護。

  • openSUSE - 前身爲SUSE Linux和SuSE Linux Professional,是一個Linux發行版與項目,由SUSE Linux GmBH與其他公司贊助。

  • Fedora Remix - 是較具知名度的Linux發行套件之一,由Fedora計畫社群開發、紅帽公司贊助,目標是建立一套新穎、多功能並且自由(開放原始碼)的作業系統。

  • Slackware ARM - 是Slackware Linux, Inc的Patrick Volkerding製作的Linux發行版本。它力圖成為「UNIX風格」的Linux發行版本。它的方針是只吸收穩定版本的應用程式,並且缺少其他Linux版本中那些為發行版本客製化的組態工具。

  • FreeBSD 與 NetBSD - BSD中較為普遍使用的作業系統.

  • Plan 9 from Bell Labs - 貝爾實驗室九號計畫是一個分散式作業系統,由貝爾實驗室的計算科學研究中心在1980年代中期至2002年開發,以作為UNIX的後繼者。它現在仍然被作業系統的研究者和愛好者開發使用。

  • Moebius[41] - 以Debian藍圖設計的輕量級ARM HF發行版。 它使用Raspbian儲存庫可容納128 GB SD卡。 它僅具有最少的服務,並且其記憶體使用已優化以保持較小的佔用空間。

  • OpenWrt - 經常運用在嵌入式裝置上,用來路由網路傳輸。

  • Kali Linux - 一個由Debian衍生出來的發行版,設計用來做數位取證和滲透測試。

  • Pardus ARM[42] - 一個基於Debian的作業系統,也是Pardus的輕量級版本。

  • Instant WebKiosk[43] - Instant WebKiosk是基於Debian GNU / Linux的作業系統。Binary Emotions完全專注於Raspberry Pi操作系統。

  • Minepeon[44] - 是用於挖掘加密貨幣的專用操作系統。

  • Kano OS[45] - 一個為專為兒童使用者製作的操作系統。

  • Nard SDK[46] - Nard GNU / Linux是Raspberry Pi的軟體開發套件(SDK) 。與「普通」 Linux發行版不同,Nard 完全旨在開發可在遠程位置晝夜運行的 嵌入式作業系統。Nard在 Raspberry Pi中的運行方式類似於PC中的 Live USB。在啟動過程中,所有內容都上傳到RAM並從那裡執行。

  • Sailfish OS - 是一個以Linux為基礎的開放原始碼作業系統,主要用於行動裝置,由諾基亞前員工成立的Jolla公司在諾基亞於2011年放棄的MeeGo系統的社區開發Mer計畫基礎上開發而來。

  • Tiny Core Linux - Tiny Core Linux是一個基於Linux4.x版本核心,採用BusyBox、Tiny X、FLTK 和其它小型軟體構築的帶圖形化使用者介面的微型Linux作業系統。由於體積很小,大約10MB,故採用整體裝載入RAM的方式執行,速度很快。

  • IPFire[47] - IPFire 是一個關注於安全的 Linux 發行版,其應用場景是當路由器和防火牆,其配有直觀的 Web管理介面,僅在Raspberry Pi 1上運行; 目前暫不計劃移植到Raspberry Pi 2以上版本。

  • xv6 - xv6是在ANSI C中針對多處理器x86系統的Unix第六版。

與數位媒體中心有關的作業系統:OpenELEC,Xbian[48],Rasplex[49],LibreELEC[50]

與音樂有關的作業系統:Volumio[51],Pimusicbox[52],Runeaudio[53],moOdeaudio[54]。

與復古電動遊戲有關的作業系統:Retropie[55],Recalbox[56],Happi Game Center[57],Lakka[58],ChameleonPi[59],Piplay[60]。

USB interface of Raspberry Pi 4

The Raspberry Pi 4 contains two USB 3.0 ports and two USB 2.0 ports which are connected to a VL805 USB controller. The USB 2.0 lines on all four ports are connected to a single USB 2.0 hub within the VL805: this limits the total available bandwidth for USB 1.1 and USB 2.0 devices to that of a single USB 2.0 port.

On the Raspberry Pi 4, the USB controller used on previous models is located on the USB type C port and is disabled by default.

Known USB Issues

Interoperability with USB 3.0 hubs

There is an issue with USB 3.0 hubs in conjunction with the use of full or low speed devices, including most mice and keyboards. A bug in most USB 3.0 hub hardware means that the models prior to Raspberry Pi 4 cannot talk to full or low speed devices connected to a USB 3.0 hub.

USB 2.0 high speed devices, including USB 2.0 hubs, operate correctly when connected via a USB 3.0 hub.

Avoid connecting low or full speed devices into a USB 3.0 hub. As a workaround, plug a USB 2.0 hub into the downstream port of the USB 3.0 hub and connect the low speed device, or use a USB 2.0 hub between the Raspberry Pi and the USB 3.0 hub, then plug low speed devices into the USB 2.0 hub.

Single TT USB hubs

USB 2.0 and 3.0 hubs have a mechanism for talking to full or low speed devices connected to their downstream ports called a transaction translator (TT). This device buffers high speed requests from the host and transmits them at full or low speed to the downstream device. Two configurations of hub are allowed by the USB specification: Single TT (one TT for all ports) and Multi TT (one TT per port). Because of a hardware limitation, if too many full or low speed devices are plugged into a single TT hub, the devices may behave unreliably. It is recommended to use a Multi TT hub to interface with multiple full and low speed devices. As a workaround, spread full and low speed devices out between the Raspberry Pi’s own USB port and the single TT hub.

Raspberry PI 4B 有兩個USB 3.0及2個USB2.0 的接孔。全部連接到VL805 USB 控制器上。全部四個端口上的USB 2.0的都接到VL805內的單 USB 2.0 hub 上,所以四個USB 2.0 的頻寬等於一個USB 2.0的頻寬 (480Mbps),

其中VL805 使用的是PCI Express 2.0 X1,該接口可用頻寬是 500MB/s (4Gpbs)。所以該USB controller 總頻寬就是4Gbps, 但是USB 3.0的速率為5Gbps, 也就是說達不到最高速率。只能實現約80 %的速度。如果兩個USB 3.0 同時使用,可用的頻寬會更低。

Raspberry PI Zero, 1, 2, 3這些之前的型號都只支持一個root USB port, 所有的USB設備數據會集中在這個單一線路上,該線最高運行速度為480 Mbps.

VIA VL805 是一個單晶片的USB 3.0 主機控制品,啟用了PIC Express 與 USB (5Gpbs的超高速),高速 (480 Mbps)的,全速 (12 Mbps)的 搭載平台,和低速(1.5 Mbps)的裝置,Root Hub包括了四個下行端口,從而實現同時運行多個外設。

Raspberry USB 口供電問題.

Raspberry PI Zero, 1 的USB 供電是每個Port 500mA, Raspberry PI 2, 3, 4 的USB port 是全部的USB 埠加起來1200mA.


Reference:

https://zh.wikipedia.org/zh-tw/%E6%A0%91%E8%8E%93%E6%B4%BE

https://www.raspberrypi.com/documentation/computers/raspberry-pi.html#maximum-power-output

https://blog.csdn.net/u012028275/article/details/122774798

寫了幾百次的測試講義…就是書上的摘録!!

一般科學,真理 的把關者就是鐵面無私的「檢驗」。


 1.軟體測試的發展簡史


1975, IEEE上發表了 “ 軟體數據選擇原理”,將軟體測試定論為一種研究方向。證實
1979, Glenford J. Myers 發行了 “軟體測試的藝術” , 證偽
1983, 軟體測試完全指南,缺陷預防
2000, 自動化測試技術盛行,向體系化發展, TMM 測試成熟度模型, TCMM 測試能力成熟度模型 等等出現
2002, 系統化軟體測試,測試是為了量測和提高軟體品質,對測試軟體進行工程設計、實施和維護的整個生命周期過程。

【Note】

2001, 敏捷軟體開發宣言, DevOps 等逐漸發展
2008, 敏捷軟體開發模式轉型,瀑布式開發測試開始轉型為敏捷式開發測試。手動式測試及自動化測試同步發展。


DevOps : 開發即運維

CI : 持續集成

CD : 持續交付

CICD 自動化流水線,再次縮短產品發布周期!

VUCA : Volatility 易變、Uncertainty 不定、Complexity 複雜、Ambiguity 模糊

2. 測試架構

與開發相比,測試更需具有系統和全局的視野視角,一個專業的測試人員可以就 基於 “對行業的理解”、”對用戶行為的剖析”、”對使用場景的狀況”、”對競爭對手的了解”等,對測試是否通過做出預測性的判斷。

要能夠對不同的組織、產品、研發模式做出最適合當下狀況的選擇並進行剛剛好的測試。

好的產品是設計出來的,測試分析不僅能夠幫助幫助測試人員更好的認識產品,還能更深入的幫助開發者確認需求設計。測試的意義不僅在通過測試發現缺陷、為產品發佈提供信心,還在於缺陷的預防,切實的的提升產品的質量。

2.1 需求分析的階段

需求是測試的源頭

理解需求 (商業目標和核心的價值)

制定測試策略 (以確定測什麼及怎麼測)

【Note】風險識別和有效的風險應對能力

2.2 測試分析和設計

以此確認測試設計中的測試的覆蓋度 (廣度與深度) 剛剛好。

測試設計大綱

【Note】
IEEE 2476-2010的定義,產品的品質是指在特定的使用條件下,產品滿足明示和隱含的需求的固有特性”,簡單來說是品質是滿足需求,但需要不是一個容易被了解的事情。

2.3 測試執行的階段

手動測試或自動化測試並分析當前測試項目和計劃的偏差

確認和計劃的偏差

選擇合適的測試案例

跟踪測試過程

【Note】明確測試目標、測試重點的能力

2.4 測試品質的評估

需求覆蓋度分析

code 的覆蓋度分析

【Note】品質分析和評估的能力

3. 系統測試計劃

基本測試約可分為 單元測試、集成測試、系統測試、驗收測試,每個測試階段又包含了 測試計劃、測試設計、測試實現、測試執行等活動。

3.1 軟體測試生命周期

軟體工程中有軟體生命周期,同樣測試也有軟體測試生命周期,它是指一個測試如何完成,
像測試計劃-> 測試設計->測試實現->測試執行就是一個典型的軟體測試生命周期。

3.2 系統測試的四個階段

系統測試是針對軟體產品系統進行的測試,在總體上包含有功能測試和非功能測試兩個部份。
.功能性測試:是驗證軟體系統功能是否符合軟體系統的需求規格的測試過程。
.非功能性測試:是在驗證軟體系統是否符合軟體系統規格的基礎上,進而驗證測試系統的容錯性、穩定性、可用性…等等的測試過程。

具體的系統測試過程與軟體組織的具體過程定義相關。通常系統測試過程可分為:

1.系統測試計劃階段:完成系統測試計劃

2. 系統測試設計階段:完成系統測試方案

3. 系統測試實現階段:完成系統測試用例、腳本和規程.

4. 系統測試執行階段:執行系統測試用例,發現問題並回歸測試,提交系統測試日報和系統測試報告。

IEEE 1028 - Software Reviews and Audits. 2008.
IEEE 829 - Standard for Software and System Test Documentation, 2008
IEEE 730 - Software Quality Assurance Processes, 2014.
IEEE 1012 - System, Software, and Hardware Verification and Validation, 2016
ISO/IEC/IEEE 15939 - Systems and software engineering - Measurement process, 2017.


T-Mobile won't support IPv4 since a few years ago.

 T-Mobile won't support IPv4 since a few years ago.

a customer, went to the CES show to demo the devices, but they use the 'T-Mobile' prepaid card and they can not obtain the IPv4 address. check a lot of forums, most customers can not use IPv4.

Better to suggest the user buy the AT&T prepaid card if they need to via IPv4 to function devices.

2023 一個客人去CES demo 5G devices, 他買了 T-Mobile 的預付卡,結果拿不到IPv4 的address, 
查了一堆美國的論壇才發現,T-Mo 很多年前就開始不支援IPv4, 僅有少數的APN有支援IPv4.

看起來未來也不打算要支援IPv4. 所以IPv6 成為了重點。而客人的軟體也要提醒他們,不要只做IPv4. (在IoT的市場,很多客人是傳統產業的,他們並不了解IPv4 &IPv6的差異)

但這個問題很有趣。

Raspberry PI with 5G module.

Raspberry PI OS is the free operating system and recommended operating system for normal use on a raspberry. Thence we use the raspberry pi 4 B+ as a client of devices.

The user should control the raspberry pi via ssh or xsrdp by hostname and based on the raspberry pi to control and verify the DUT’s functions.


The Architecture:

Currently, we use the wireless interface of the raspberry pi to access the testing network domain. After executing the test they automatically upload the status to JIRA, also connecting the USB interface to the device.

The raspberry pi supports two UARTs (GPIO 14 & 15). when the device provides the serial console, we use it for debugging.

The Raspberry Pi installed programs list and server setup guide.

  1. SSH
    enable the SSH services.

    pi@raspberrypi-xs5g03:~ $ sudo raspi-config select "3. Interface Options" and choose "I2 SSH" to enable the SSH
  2. VNC
    enable the VNC server

    pi@raspberrypi-xs5g03:~ $ sudo raspi-config select "3. Interface Options" and choose "I3 VNC" to enable the VNC
  3. Xrdp
    install the xrdp and add a new user for this service.

    root@Raspbian:~# apt-get install xrdp
    root@Raspbian:~# reboot
    root@Raspbian:~# useradd -m atd #-m參數為新增使用者建立家目錄 
    root@Raspbian:~# passwd atd #pw XSlinux123
  4. tftp server / ftp server
    Installing the tftpd server.

    sudo systemctl status tftpd-hpa

    check the tftpd status

    pi@raspberrypi-xs5g03:~ $ sudo service vsftpd status
    vsftpd.service - vsftpd FTP server
         Loaded: loaded (/lib/systemd/system/vsftpd.service; enabled; vendor preset: enabled)
         Active: active (running) since Thu 2022-10-27 13:45:45 CST; 1min 22s ago
        Process: 2275 ExecStartPre=/bin/mkdir -p /var/run/vsftpd/empty (code=exited, status=0/SUCCESS)
       Main PID: 2276 (vsftpd)
          Tasks: 1 (limit: 4915)
            CPU: 16ms
         CGroup: /system.slice/vsftpd.service
                 └─2276 /usr/sbin/vsftpd /etc/vsftpd.conf
    
    Oct 27 13:45:45 raspberrypi-xs5g03 systemd[1]: vsftpd.service: Succeeded.
    Oct 27 13:45:45 raspberrypi-xs5g03 systemd[1]: Stopped vsftpd FTP server.
    Oct 27 13:45:45 raspberrypi-xs5g03 systemd[1]: Starting vsftpd FTP server...
    Oct 27 13:45:45 raspberrypi-xs5g03 systemd[1]: Started vsftpd FTP server.
    
  5. web server (for WebUI direct)
    Installing Apache:

    pi@raspberrypi:~ $sudo apt-get update pi@raspberrypi:~ $sudo apt-get install apache2 -y

    Configure the default web page:

    pi@raspberrypi:~ $cd /var/www/html
    pi@raspberrypi:~ $ls -la
  6. go language
    Installing the golang

    pi@raspberrypi:~ $ sudo apt-get install golang
    pi@raspberrypi:~ $ go version
    go version go1.15.15 linux/arm
  7. adb
    Installing the adb

pi@raspberrypi:~ $ sudo apt-get update pi@raspberrypi:~ $ sudo apt-get install adb android-sdk-platform-tools-common ppi@raspberrypi-xs5g03:~ $ adb --version Android Debug Bridge version 1.0.41 Version 28.0.2-debian Installed as /usr/lib/android-sdk/platform-tools/adb

Verify the adb function.

pi@raspberrypi:~ $ lsusb Bus 002 Device 002: ID 0e8d:7129 MediaTek Inc. USB DATA CARD pi@raspberrypi-xs5g03:~ $ adb devices * daemon not running; starting now at tcp:5037 * daemon started successfully List of devices attached 351488270000880 device pi@raspberrypi:~ $ adb shell

8. Enable the UART port.

launch the raspi-config

pi@raspberrypi:~ $ sudo raspi-config

Turn on the serial port.

Install the termial “minicom”

pi@raspberrypi:~# apt-get update pi@raspberrypi:~# apt-get install minicom

Launch the Serial console port:

pi@raspberrypi:~# sudo minicom -D /dev/ttyUSB4 -b 921600

For XS5G03/04:

Auto add XS5G03/04 modules on raspberry pi:

  • Add a udev rules file that contains the USB configuration.

pi@raspberrypi:~ $ sudo vim /etc/udev/rules.d/51-android.rules
SUBSYSTEM=="usb", ATTR{idVendor}=="0e8d", ATTR{idProduct}=="7127", MODE="0666", GROUP="plugdev", SYMLINK+="android%n", RUN+="/bin/sh -c 'echo "0e8d 7129" > /sys/bus/usb-serial/drivers/generic/new_id'"
  • Crate a USB serial configuration file

pi@raspberrypi:~ $ sudo vim /etc/modules-load.d/usbserial.conf usbserial
  • Disable the Modem Manager to release /dev/ttyUSB4 (MD AT port)

systemctl disable ModemManager.service systemctl stop ModemManager.service
  • Check the Modem Manager status.

systemctl list-dependencies multi-user.target | grep Modem
  • Reboot the raspberry.

  • Check the USB devices information.

pi@raspberrypi:~ $lsusb Bus 002 Device 002: ID 0e8d:7129 MediaTek Inc. USB DATA CARD
  • View the network interfaces

pi@raspberrypi:~ $ifconfig .... wwan0: flags=4291<UP,BROADCAST,RUNNING,NOARP,MULTICAST> mtu 1500 inet 169.254.26.41 netmask 255.255.0.0 broadcast 169.254.255.255 inet6 fe80::3abc:c06e:2352:d2b0 prefixlen 64 scopeid 0x20<link> ether 26:c9:17:59:46:25 txqueuelen 1000 (Ethernet) RX packets 0 bytes 0 (0.0 B) RX errors 0 dropped 0 overruns 0 frame 0 TX packets 2818 bytes 1021241 (997.3 KiB) TX errors 0 dropped 0 overruns 0 carrier 0 collisions 0
  • Launch the Serial console port:

pi@raspberrypi:~# sudo minicom -D /dev/ttyS0 -b 921600 Port /dev/ttyUSB4 Press CTRL-A Z for help on special keys +ESIMS: 1,29 +ESIMS: 0,1 +ESIMS: 0,11 at OK

Manual add XS5G03/04 modules on a raspberry pi:

pi@raspberrypi:~ $ ls /dev/tty* pi@raspberrypi:~ $ sudo modprobe usbserial pi@raspberrypi:~ $ sudo chmod u+w /sys/bus/usb-serial/drivers/generic/new_id pi@raspberrypi:~ $ sudo echo "0e8d 7129" > /sys/bus/usb-serial/drivers/generic/new_id pi@raspberrypi:~ $ ls /dev/ttyUSB* /dev/ttyUSB0 /dev/ttyUSB1 /dev/ttyUSB2 /dev/ttyUSB3 /dev/ttyUSB4 /dev/ttyUSB5 /dev/ttyUSB6 /dev/ttyUSB7 pi@raspberrypi:~ $ minicom -b 115200 -D /dev/ttyUSB3

Reference information:

Raspberry Pi setup part:

reference : https://www.raspberrypi.com/products/raspberry-pi-4-model-b/

https://www.circuitbasics.com/introduction-to-web-servers/

UART Part: